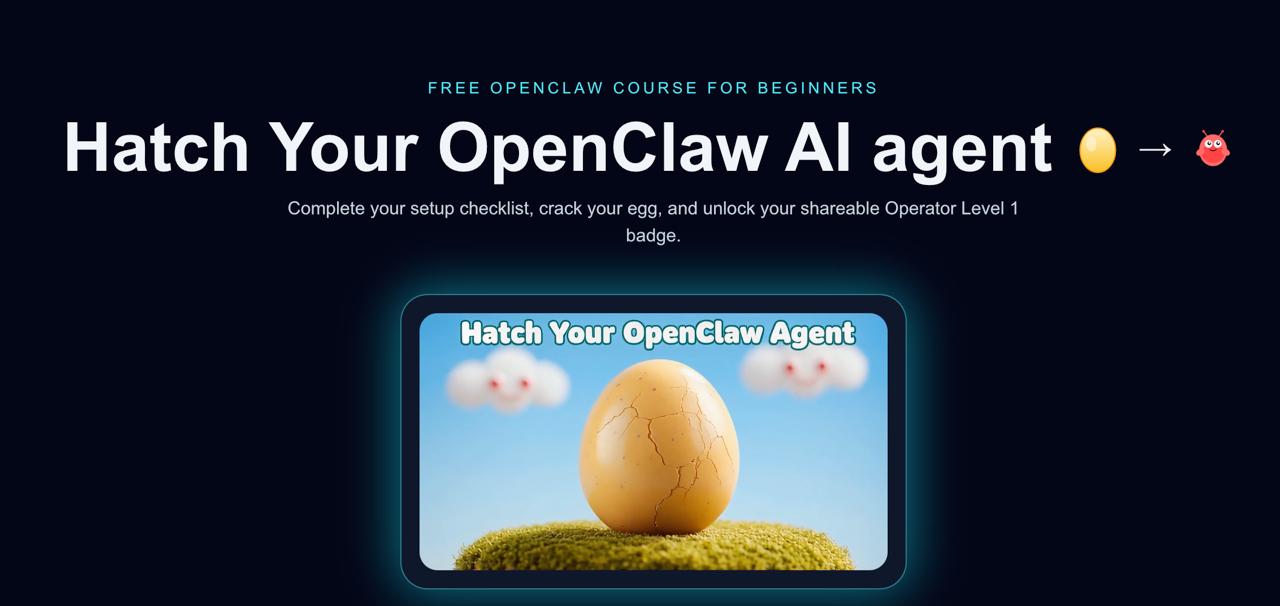
We built a complete gamified learning management system — hatch.learnopenclaw.ai — where users complete 12 real-world quests to “hatch” their AI agent, earn on-chain credentials, and receive a verifiable certificate. The entire platform was built using OpenClaw’s autonomous coding system (RALPH loops), AI-generated tutorial videos, and integrated with Stripe payments, cryptocurrency wallets, Ethereum Attestation Service (EAS), and Loops email automation.
This is the story of how we built it — from a single PRD markdown file to a fully deployed production app — and how you can use the same approach to build your own course platform.
Why Build a Gamified LMS?
Traditional courses are boring. You watch videos, read text, maybe answer a quiz. The completion rate for most online courses hovers around 5-15%. We wanted something different for teaching people how to use OpenClaw.
The idea was simple: what if learning felt like a game? Instead of passive video consumption, users would complete real tasks on their own machines. Instead of a progress bar, they’d watch an egg crack and hatch into a lobster creature. Instead of a PDF certificate, they’d get an on-chain attestation on Base that proves they actually did the work.
Here’s what we ended up building:
- 12 hands-on quests — from opening a terminal to connecting Twitter
- AI-generated tutorial videos — one per quest, created with Python + OpenAI TTS
- Gamified progression — egg cracks as you complete quests, hatches at 10/12
- Dual payment system — Stripe ($20 USD) or crypto (USDC on Base)
- On-chain credentials — EAS attestations on Base blockchain
- Automated certificate delivery — PDF generation + email via Loops API
- Full deployment — Railway hosting with persistent storage + Cloudflare DNS
And the wildest part? The core application — all 26 tasks in the PRD — was built autonomously by RALPH, our AI coding loop system.
Phase 1: The PRD That Built an App
Every RALPH project starts with a PRD (Product Requirements Document). This isn’t a vague spec — it’s a detailed, task-by-task breakdown that the AI coding agent can execute autonomously.
Here’s what our PRD covered:
- Overview: Gamified onboarding — 12 quests → hatch AI egg → mint credential
- User flow: Sign up → see egg → complete quests → watch egg crack → hatch → earn certificate
- Tech stack: Next.js + Tailwind CSS, SQLite database, GitHub OAuth + email auth
- 26 specific tasks broken into 4 phases: Foundation, Verification Engine, Creature & Rewards, Polish & Launch
The PRD was detailed enough that RALPH could pick up any task and know exactly what to build. Here’s a sample of the task breakdown:
### Phase 1: Foundation (8 tasks)
- [x] Initialize Next.js project with Tailwind
- [x] Set up SQLite database + models (users, quest_progress)
- [x] Implement GitHub OAuth + email/password auth
- [x] Create landing page with egg hero animation
- [x] Build split-screen dashboard layout
- [x] Build quest detail panel with video embed
- [x] Create quest content for all 12 quests
- [x] Set up Railway deployment

### Phase 2: Verification Engine (7 tasks)
- [x] Design proof code format + HMAC signing spec
- [x] Build proof code decoder + verification
- [x] Implement quest completion logic
- [x] Add progress state management

### Phase 3: Creature & Rewards (6 tasks)
- [x] Design SVG claw creature with traits
- [x] Build creature generation function
- [x] Create hatching animation
- [x] Generate shareable badge card

### Phase 4: Polish & Launch (5 tasks)
- [x] Quest instructions + help links
- [x] Error states, loading states
- [x] Mobile responsive pass
- [x] Analytics + launch checklist
How RALPH Executed It
RALPH (Recursive Autonomous Loop for Programming Harmony) works by spawning a coding agent (OpenAI Codex), giving it 1-3 tasks from the PRD, letting it code and commit, then killing the session and starting fresh with the next batch of tasks. This “fresh context” approach prevents hallucination and context window overflow.
Here’s how you start a RALPH loop:
$ ./scripts/ralphy.sh prds/openclaw-quests.md --repo /root/projects/openclaw-quests-mvpRALPH completed all 26 tasks autonomously — the entire foundation of the app, from database schema to authentication to the hatching animation. The git log tells the story: commit after commit of working code, each one checking off tasks from the PRD.
Key lesson: The quality of your PRD directly determines the quality of RALPH’s output. Vague tasks produce vague code. Specific, testable tasks produce working features. We spent about 2 hours writing the PRD, and RALPH spent about 8 hours building the app. That’s a massive leverage ratio.
Phase 2: Architecture Deep Dive
The app that RALPH built follows a clean, modern architecture:
Tech Stack
- Frontend: Next.js with Tailwind CSS — server-rendered React with utility-first styling
- Backend: Next.js API routes — no separate backend server needed
- Database: Started with SQLite (
better-sqlite3), later migrated to PostgreSQL for production - Auth: Email OTP (magic links), GitHub OAuth, and email/password fallback
- Hosting: Railway with persistent volumes + Cloudflare for DNS and CDN
Database Schema
The data model is straightforward — four core tables handle everything:
-- Core tables
users          -- id, email, username, github_id, agent_name, hatch_date
progress       -- user_id, quest_id, status, completed_at
payments       -- user_id, stripe_session_id, amount, crypto_tx_hash
attestations   -- user_id, attestation_uid, wallet_address, created_at
The Quest System
Each of the 12 quests maps to a real OpenClaw setup task. The progression is intentionally ordered from easy to hard:
- Open the Terminal — SSH into your VPS
- Give It a Home — Install OpenClaw
- Choose a Brain — Configure an AI model + API keys
- Teach It to Talk — Connect a messaging channel
- First Conversation — Send 5 messages to your agent
- Name Your Agent — Set up IDENTITY.md
- Memory Lane — Create MEMORY.md or USER.md
- Time Keeper — Set up your first cron job
- Web Explorer — Use web search through your agent
- The Automator — Create an automation that runs successfully
- SSH Keys — Configure secure access
- Mission Control — Set up the dashboard
Users need to complete 10 out of 12 to hatch their egg — allowing them to skip the two hardest quests if needed. This is a deliberate gamification choice: rigid 100% requirements kill completion rates.
The SQLite to PostgreSQL Migration
We started with SQLite because it’s dead simple — one file, no server, perfect for an MVP. But Railway’s ephemeral filesystem taught us a hard lesson: every deployment wiped the database.
The first fix was Railway’s persistent volumes — mounting /data/ as persistent storage so quests.db survived deploys. But as we added payment processing and attestations, we needed something more robust. The migration to PostgreSQL was straightforward:
// Before: SQLite
import Database from 'better-sqlite3';
const db = new Database('/data/quests.db');

// After: PostgreSQL
import { Pool } from 'pg';
const pool = new Pool({ connectionString: process.env.DATABASE_URL });
Railway makes PostgreSQL trivial — add the plugin, get a DATABASE_URL, and you’re running.
Phase 3: Creating Tutorial Videos with AI
Every quest has a tutorial video. Creating 12 professional-looking tutorial videos manually would take weeks. We built an AI-powered pipeline that produces a finished video in about 10-15 minutes per quest.
The Pipeline
The video creation workflow has four stages:
- Script writing — Write the narration script for the quest walkthrough
- Slide generation — Python script using PIL to create branded slide images
- Voiceover — OpenAI TTS API generates natural-sounding narration
- Rendering — ffmpeg combines slides + audio into a final video
Slide Generation with Python/PIL
Each slide is generated programmatically with consistent branding:
from PIL import Image, ImageDraw, ImageFont

def create_slide(title, bullet_points, slide_number):
    # Create 1920x1080 canvas with dark background
    img = Image.new('RGB', (1920, 1080), color='#1a1a2e')
    draw = ImageDraw.Draw(img)

    # Add branded header
    draw.text((100, 60), "Learn OpenClaw", font=header_font, fill='#e94560')

    # Add title
    draw.text((100, 180), title, font=title_font, fill='#ffffff')

    # Add bullet points with spacing
    y_position = 340
    for point in bullet_points:
        draw.text((140, y_position), f"• {point}", font=body_font, fill='#cccccc')
        y_position += 80

    img.save(f'slides/slide_{slide_number:02d}.png')
    return img
Voice Generation with OpenAI TTS
For voiceover, we used OpenAI’s Text-to-Speech API. The quality is remarkably natural:
import openai

client = openai.OpenAI()

response = client.audio.speech.create(
    model="tts-1-hd",
    voice="nova",       # Clear, professional female voice
    input=script_text,
    response_format="mp3"
)

with open("voiceover.mp3", "wb") as f:
    f.write(response.content)
Final Rendering with ffmpeg
The magic happens when ffmpeg stitches everything together — slides timed to the audio narration:
$ ffmpeg -framerate 1/5 -i slides/slide_%02d.png \
    -i voiceover.mp3 \
    -c:v libx264 -pix_fmt yuv420p \
    -c:a aac -shortest \
    -vf "scale=1920:1080" \
    output_quest_video.mp4
The -framerate 1/5 flag means each slide displays for 5 seconds. We adjusted timing per slide to match the narration pacing. Each finished video runs about 45 seconds to 2 minutes.
The result: All 12 quest videos were created in a single afternoon. No camera, no editing software, no voice actors. Just Python, OpenAI, and ffmpeg.
Phase 4: Stripe Payment Integration
The platform offers a premium certificate for $20 — verifiable on-chain with a PDF delivered to your email. We integrated Stripe for traditional payments and crypto wallets for Web3 users.
Stripe Checkout
Stripe’s hosted checkout makes this almost trivially simple:
import Stripe from 'stripe';

const stripe = new Stripe(process.env.STRIPE_SECRET_KEY);

// Create a checkout session
const session = await stripe.checkout.sessions.create({
  payment_method_types: ['card'],
  line_items: [{
    price_data: {
      currency: 'usd',
      product_data: {
        name: 'OpenClaw Operator Certificate',
        description: 'Verified on-chain credential + PDF certificate',
      },
      unit_amount: 2000, // $20.00
    },
    quantity: 1,
  }],
  mode: 'payment',
  success_url: `${process.env.NEXT_PUBLIC_URL}/certificate?session_id={CHECKOUT_SESSION_ID}`,
  cancel_url: `${process.env.NEXT_PUBLIC_URL}/dashboard`,
  metadata: { userId: user.id },
});

// Redirect user to Stripe's hosted checkout
return res.json({ url: session.url });
Crypto Payments with RainbowKit
For Web3 users, we integrated RainbowKit (which bundles wagmi under the hood) to accept USDC on Base:
// lib/usdc.ts
import { parseUnits } from 'viem';

export const USDC_CONTRACT = '0x833589fCD6eDb6E08f4c7C32D4f71b54bdA02913'; // USDC on Base
export const REQUIRED_AMOUNT = 20_000_000; // 20 USDC (6 decimals)
export const RECIPIENT = process.env.NEXT_PUBLIC_PAYMENT_ADDRESS;

// wallet-pay-modal.tsx
const { writeContract } = useWriteContract();

const handleCryptoPay = async () => {
  await writeContract({
    address: USDC_CONTRACT,
    abi: erc20Abi,
    functionName: 'transfer',
    args: [RECIPIENT, parseUnits("20", 6)],
  });
};
We chose RainbowKit over ThirdWeb for its simpler integration and better mobile wallet support. It supports MetaMask, Rainbow, Coinbase Wallet, and Phantom out of the box — covering the vast majority of crypto users.
Why dual payments? Our audience splits between traditional developers (who prefer cards) and Web3-native users (who prefer crypto). Offering both removed a friction point that would have cost us conversions.
Phase 5: On-Chain Credentials with EAS
This is where things get interesting. Instead of just issuing a PDF certificate (which anyone can fake), we mint an on-chain attestation using the Ethereum Attestation Service (EAS) on Base.
What EAS Does
EAS creates verifiable, on-chain records that prove someone completed the course. Think of it as a blockchain-native certificate of completion. Anyone can verify it on-chain — it’s permanent, tamper-proof, and linked to the user’s wallet address.
The Implementation
// lib/eas.ts
import { EAS, SchemaEncoder } from '@ethereum-attestation-service/eas-sdk';

const EAS_CONTRACT = '0x4200000000000000000000000000000000000021'; // EAS on Base
const SCHEMA_UID = process.env.EAS_SCHEMA_UID;

export async function createAttestation(recipientAddress: string, questsCompleted: number) {
  const eas = new EAS(EAS_CONTRACT);
  await eas.connect(signer);

  const schemaEncoder = new SchemaEncoder(
    'string courseName, uint8 questsCompleted, uint8 totalQuests, uint256 completionDate'
  );

  const encodedData = schemaEncoder.encodeData([
    { name: 'courseName', value: 'OpenClaw Operator Level 1', type: 'string' },
    { name: 'questsCompleted', value: questsCompleted, type: 'uint8' },
    { name: 'totalQuests', value: 12, type: 'uint8' },
    { name: 'completionDate', value: Math.floor(Date.now() / 1000), type: 'uint256' },
  ]);

  const tx = await eas.attest({
    schema: SCHEMA_UID,
    data: {
      recipient: recipientAddress,
      data: encodedData,
      revocable: true,
    },
  });

  const attestationUID = await tx.wait();
  return attestationUID;
}
A Clever Hack: Wallet Address in the Email Field
For crypto payments, we needed to store the payer’s wallet address to link the payment to the attestation. Rather than adding a new database column, we repurposed the email field in the EAS attestation data for crypto payment source proof. It’s stored alongside the attestation UID in our database, creating a verifiable chain: wallet → payment tx → attestation.
This was a pragmatic decision — not architecturally “pure,” but it shipped fast and works correctly. You can always refactor later.
Phase 6: Certificate Delivery with Loops
When a user completes payment and earns their attestation, two things happen: a PDF certificate is generated, and it’s emailed to them via the Loops API.
PDF Generation with jsPDF
We generate certificates on both client and server side using jsPDF:
// generate-certificate-pdf.ts
import { jsPDF } from 'jspdf';

export function generateCertificate(userName: string, completionDate: string, attestationUID: string) {
  const doc = new jsPDF({ orientation: 'landscape' });

  // Header
  doc.setFontSize(36);
  doc.text('Certificate of Completion', 148, 50, { align: 'center' });

  // Branding
  doc.setFontSize(16);
  doc.text('Learn OpenClaw — Operator Level 1', 148, 70, { align: 'center' });

  // Recipient
  doc.setFontSize(24);
  doc.text(userName, 148, 110, { align: 'center' });

  // Details
  doc.setFontSize(14);
  doc.text(`Completed: ${completionDate}`, 148, 140, { align: 'center' });
  doc.text(`On-chain verification: ${attestationUID}`, 148, 155, { align: 'center' });
  doc.text('Verified on Base via Ethereum Attestation Service', 148, 170, { align: 'center' });

  return doc.output('arraybuffer');
}
We chose jsPDF over more complex PDF libraries because it handles basic text and layout without unicode headaches. For a certificate with consistent content, it’s more than sufficient.
Email Delivery via Loops API
Loops handles transactional email delivery. When a certificate is generated, we trigger a Loops template with the PDF attached:
const LOOPS_API_KEY = process.env.LOOPS_API_KEY;
const TEMPLATE_ID = process.env.LOOPS_CERTIFICATE_TEMPLATE_ID;

async function sendCertificateEmail(email: string, userName: string, pdfBuffer: Buffer) {
  const response = await fetch('https://app.loops.so/api/v1/transactional', {
    method: 'POST',
    headers: {
      'Authorization': `Bearer ${LOOPS_API_KEY}`,
      'Content-Type': 'application/json',
    },
    body: JSON.stringify({
      transactionalId: TEMPLATE_ID,
      email: email,
      dataVariables: {
        userName: userName,
        courseName: 'OpenClaw Operator Level 1',
      },
      attachments: [{
        filename: 'openclaw-certificate.pdf',
        contentType: 'application/pdf',
        data: pdfBuffer.toString('base64'),
      }],
    }),
  });

  return response.json();
}
Loops was a great choice for this use case — their transactional email API is clean, the template builder is intuitive, and deliverability is solid. Plus, the free tier is generous enough for an MVP.
Phase 7: Testing, Deployment, and the Bugs We Squashed
No project ships without a gauntlet of bugs. Here are the most instructive ones we hit and how we fixed them.
Bug 1: The Disappearing Database
Railway’s filesystem is ephemeral by default. Every deployment wipes everything that isn’t in your git repo. We discovered this the hard way when our first test users’ progress vanished after a push.
Fix: Railway persistent volumes. Mount /data/ as a persistent volume, store the database there:
// railway.toml
[deploy]
  startCommand = "npm start"

[volumes]
  data = "/data"
Later, we migrated to Railway’s managed PostgreSQL service — which handles persistence, backups, and scaling automatically.
Bug 2: Auth Redirect Loop
After login, users were redirected to / instead of /dashboard. The dashboard route didn’t even exist yet — RALPH had built auth but not the post-auth flow. A quick route addition fixed it:
// Redirect after successful authentication
res.redirect('/dashboard');  // Not '/' !
Bug 3: Attestation Persistence
Users who paid with crypto could generate attestations, but the attestation UID wasn’t being saved to the database for unauthenticated sessions. The fix was allowing attestation creation without requiring an active session, then linking it to the user’s account when they authenticated:
// Allow unauthenticated attestation creation
// but persist to DB when user is authenticated
if (req.user) {
  await db.query(
    'INSERT INTO attestations (user_id, attestation_uid, wallet_address) VALUES ($1, $2, $3)',
    [req.user.id, attestationUID, walletAddress]
  );
}
Bug 4: Video Compression
The homepage had a lobster hatching video that was 11MB — way too heavy for a landing page. We compressed it down to 809KB (93% reduction) using ffmpeg:
$ ffmpeg -i lobster.mp4 -vcodec libx264 -crf 28 -preset slow -an lobster-compressed.mp4The -crf 28 flag is the quality level (higher = smaller file, lower quality). 28 is a good balance for web video. -an strips audio since it’s a decorative animation.
Deployment Architecture
The final deployment setup:
- Railway — hosts the Next.js app + PostgreSQL database
- Cloudflare — DNS pointing
hatch.learnopenclaw.aito Railway, plus CDN and SSL - GitHub — auto-deploys on push to main branch
- Environment variables — Stripe keys, Loops API key, EAS config, WalletConnect project ID, database URL
Phase 8: Audio and Polish
Small details make gamification feel real. We added audio cues throughout the experience:
- Egg crack sound — plays when you complete a quest and the egg progresses
- Celebration sound — programmatically generated (no audio file needed) when you mint your certificate
- “Lobster wins” audio — a fun sound effect for the hatching moment
- Footer music player — ambient background music (optional, user-controlled)
We initially tried loading an MP3 file for the celebration sound, but it added unnecessary weight. Instead, we used the Web Audio API to generate a simple celebratory chime programmatically — zero file size overhead.
Lessons Learned
After building the entire platform, here are the biggest takeaways:
1. PRD Quality Is Everything
RALPH is only as good as the PRD you feed it. Our 26-task PRD with specific acceptance criteria for each task meant RALPH could work autonomously for hours. Vague requirements like “build the payment system” would have produced unusable code. Instead, we wrote “Implement Stripe checkout with $20 price point, redirect to /certificate on success, store session_id in payments table.”
2. Start Simple, Migrate Later
SQLite → PostgreSQL was the right call. Starting with SQLite let us iterate fast without database server overhead. When we needed persistence and concurrent connections, the migration was straightforward because we’d kept our queries simple.
3. AI Video Production Is Viable
10-15 minutes per polished tutorial video is game-changing. The Python/PIL + OpenAI TTS + ffmpeg pipeline produces content that’s genuinely useful — not perfect, but good enough for tutorial content. The key is consistent branding (same colors, fonts, layout) across all slides.
4. Dual Payments Remove Friction
Stripe for traditional users, crypto for Web3 users. Every payment option you don’t offer is a potential customer who walks away. RainbowKit made the crypto integration surprisingly painless — it handles wallet connection, chain switching, and transaction flow out of the box.
5. On-Chain Credentials Add Real Value
EAS attestations aren’t just a gimmick. They provide verifiable proof of completion that can’t be faked. Employers, DAOs, or other platforms can verify the credential independently. That’s a genuine differentiator over a printable PDF.
6. Railway Is Excellent for MVPs
One command deploys, persistent volumes, managed PostgreSQL, auto-SSL, custom domains. Railway removed all the DevOps friction that would have slowed us down. For a small team building fast, it’s hard to beat.
7. Gamification Needs Audio
The egg cracking, the celebration sounds, the ambient music — these seem like small details, but they transformed the experience from “online course” to “game.” Users actually feel something when their egg cracks. That emotional response drives completion.
What’s Next
Hatch is live at hatch.learnopenclaw.ai and users are already hatching their agents. Here’s what’s on the roadmap:
- More evolution stages — beyond Level 1 (Scout → Operator → Commander → Autonomous)
- Auto-verification — optional live endpoint so users don’t need to paste proof codes
- Community features — leaderboards, streaks, and social sharing improvements
- More courses — advanced topics like multi-agent systems, custom skills, and API integrations
- ClawMart listing — packaging the entire LMS setup as a purchasable persona/skill bundle
The entire platform — from PRD to production — took about two weeks. RALPH handled the heavy coding, AI generated the videos, and the integrations (Stripe, EAS, Loops) each took about a day to wire up. If you’re thinking about building a course platform, this stack is battle-tested and ready to clone.
Try It Yourself
Ready to hatch your own AI agent? Head to hatch.learnopenclaw.ai and start your first quest. It’s free to complete all 12 quests — the certificate and on-chain credential are the premium upgrade.
And if you want to build your own gamified LMS using the same approach, here’s your quick-start:
- Write a detailed PRD with specific, testable tasks
- Run RALPH to build the foundation autonomously
- Add payment integration (Stripe is the fastest path)
- Generate video content with the Python/OpenAI TTS/ffmpeg pipeline
- Deploy on Railway with PostgreSQL
- Set up email delivery with Loops
- Add on-chain credentials with EAS if your audience values verifiability
The tools exist. The stack works. The only thing left is your PRD. 🦞
Frequently Asked Questions
How long did the entire project take?
About two weeks from PRD to production. RALPH built the core app (26 tasks) in roughly 8 hours of autonomous coding. Video creation took an afternoon. Each integration (Stripe, EAS, Loops) took about a day. The rest was testing, bug fixes, and polish.
How much did it cost to build?
RALPH runs on a ChatGPT Plus subscription ($20/month) — no per-API-call charges for coding. OpenAI TTS for 12 videos cost a few dollars. Railway hosting is about $5/month. Total infrastructure cost is under $30/month.
Can I use this approach for non-technical courses?
Absolutely. The gamification pattern (quests, progression, rewards) works for any subject. The verification system is specific to OpenClaw tasks, but you could replace it with quiz completion, assignment submission, or manual instructor approval. The payment, certificate, and email delivery systems work for any course content.
Why Base instead of Ethereum mainnet for EAS?
Gas fees. Minting an attestation on Ethereum mainnet could cost $5-20 in gas. On Base (an Ethereum L2), the same transaction costs fractions of a cent. For a credential system where you want low friction, L2 is the practical choice.
What’s the completion rate so far?
It’s early, but the gamified approach is showing significantly better engagement than our previous traditional course format. The “10 out of 12” threshold was a smart design decision — it reduces the frustration of getting stuck on one hard quest while still requiring meaningful completion.
Can I fork this and build my own?
The repo is at github.com/ahmadabugosh/openclaw-quests-mvp. It’s built with Next.js and all the integrations are modular — swap out Stripe for Lemonsqueezy, EAS for simple database credentials, Loops for SendGrid. The architecture is designed to be adaptable.